How to Navigate Coyote Gulch in One Day: Routes & Tips
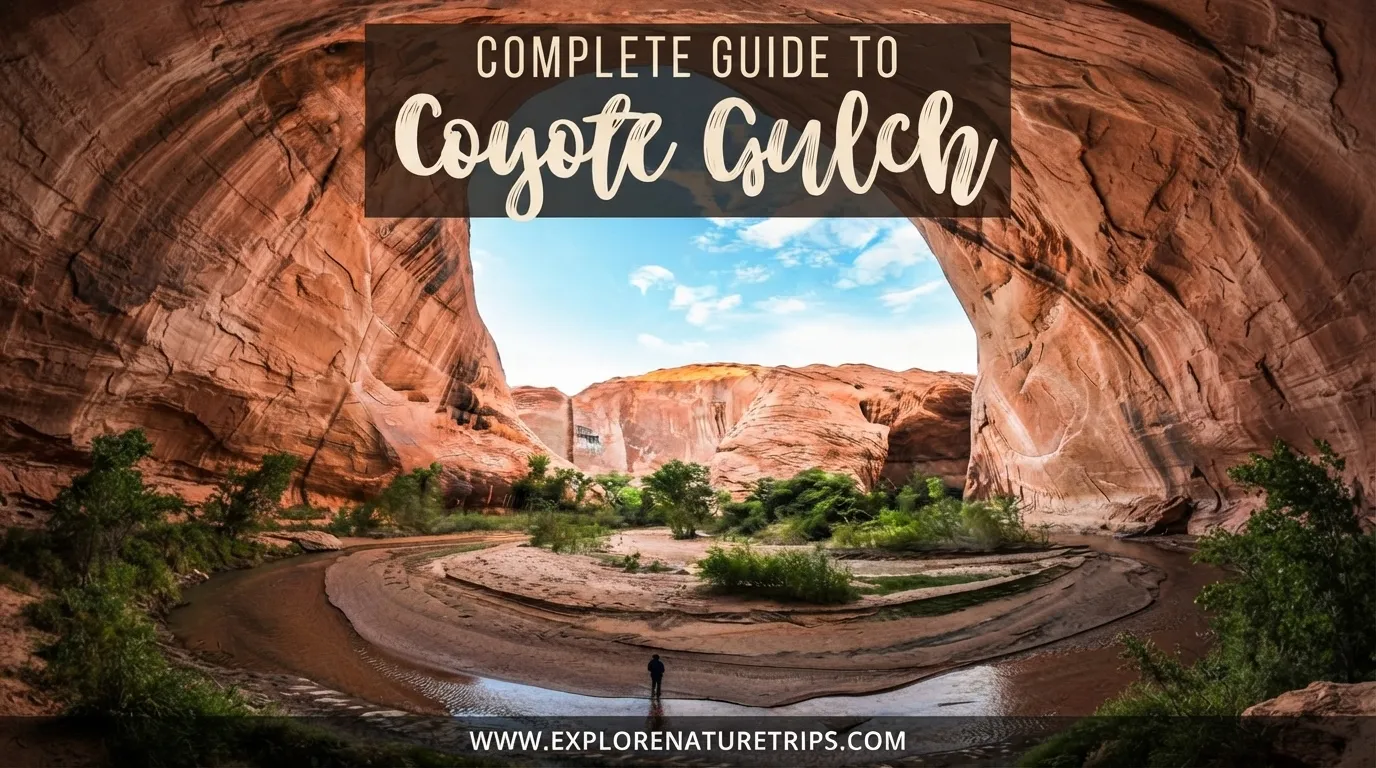
Coyote Gulch is one of the standout hiking areas in Grand Staircase-Escalante, Utah, known for its enormous arches, canyon walls, flowing water, natural bridge, and remote desert setting. A one-day hike is possible, but the route requires more planning than simply following a marked trail.
The main challenge is choosing the right entrance, navigating poorly marked terrain, allowing enough time for the return journey, and preparing for a steep descent into the canyon. The three main day-hike approaches covered by experienced hikers are the Sneaker Route, Coyote Gulch Access Point, and Coyote Gulch loop.
For most first-time day hikers, the Sneaker Route/Water Tank trailhead is the simplest option discussed. The loop is another useful choice for hikers who want to see more of the canyon in approximately 10 miles.
Planning a one-day hike through Coyote Gulch? Below you’ll find the best routes and essential tips to help you navigate it successfully.
Choose Your One-Day Route First
The biggest planning decision is your entry route. The three day-hike approaches highlighted do not offer the same experience.
1. Sneaker Route / Water Tank Trailhead
The Sneaker Route is the most straightforward choice for a one-day out-and-back trip. It uses the Water Tank trailhead, approaches the canyon, descends near Jacob Hamblin Arch, explores Coyote Gulch, and returns by the same general route. One source describes it as the easiest option and particularly suitable for beginners.
The Water Tank approach involves roughly 2 miles of walking over rocks and sand before reaching the descent area in the account documented by Be My Travel Muse. The complete hike was 12 miles, beginning at 7 a.m. and ending before 3 p.m.
This makes the route attractive when your priority is reaching the canyon and its major sights without committing to a longer multi-day approach.
Best for: hikers wanting a relatively direct one-day out-and-back.
2. Coyote Gulch Access Point
The second option starts from the Coyote Gulch Access Point and eventually reaches the same general descent area near Jacob Hamblin Arch.
The route can reach approximately 10 miles out and back, but it requires stronger navigation skills. One experienced account specifically describes getting lost while attempting this approach and therefore does not recommend it for hikers who are unfamiliar with desert navigation.
Best for: hikers comfortable with navigation and remote desert terrain.
3. Coyote Gulch Loop
The loop provides another approximately 10-mile day-hike option. Rather than approaching the canyon from the same direction as the Water Tank route, it enters through Crack in the Wall, travels through Coyote Gulch, reaches the Jacob Hamblin Arch area, and then returns toward the starting point.
The advantage is that you can experience a larger portion of the canyon within a single day. The route is described as more moderate than some of the alternatives, although the terrain and access still require preparation.
Best for: experienced hikers who want a broader one-day canyon experience.
How Long Does a One-Day Coyote Gulch Hike Take?
There is no single duration because mileage, route choice, sand, water, photography, navigation mistakes, and the descent can all change the schedule.
One documented hike covered 12 miles and took approximately 8 hours, from 7 a.m. to before 3 p.m. The author noted that much of the route was relatively flat but that hiking through sand made the day tiring.
Another group covered 10.7 miles in approximately 8.5 hours, starting at 10:40 a.m. and finishing around 7:10 p.m. Their experience illustrates why starting late can make a one-day itinerary much more demanding.
The practical lesson is simple: do not plan your day around the shortest possible completion time.
Start Early
An early start is one of the strongest recommendations repeated across the experiences.
One hiker began around 11 a.m. and lost several hours because of navigation mistakes. The recommendation was to begin around 7–8 a.m. instead.
Another successful itinerary started at 7 a.m. and completed the 12-mile hike before 3 p.m.
Starting early gives you more time for:
- Navigation errors
- Photo stops
- Exploring arches
- Water crossings
- Rest breaks
- Finding the correct return route
- Getting back before darkness
Understand the Descent Before You Go
The descent into Coyote Gulch is one of the most important parts of the Sneaker Route.
They describe a steep rock descent near Jacob Hamblin Arch, with estimates of approximately 200–250 feet. One account describes the slope as around a 45-degree grade.
A 200-foot rope was carried by one hiker specifically for this section. The rope cost $100 in that account. Although another rope happened to be attached at the location, the recommendation was not to rely on finding one there.
Another account describes the Sneaker Route descent as roughly 100 feet and recommends a 100+ foot rope, demonstrating that measurements and descriptions can vary depending on exactly where the descent is measured.
The important point is not to treat a particular rope length as a guarantee. Instead, understand that this route includes a steep descent requiring careful preparation.
If heights, steep scrambling, or rope-assisted terrain are outside your comfort level, consider an alternative entrance rather than forcing the Sneaker Route.
Look for the Correct Descent Area
The descent is located near Jacob Hamblin Arch.
One account identifies a white bird-like symbol on the canyon wall as a useful visual indication that you are approaching the appropriate descent area.
This is especially useful because the terrain is not presented as a conventional, continuously marked trail. A hiker who simply follows random footprints can easily end up away from the intended route.
Download Your Map Before Losing Service
Navigation is a major part of the Coyote Gulch experience.
The trail can be confusing, and cell service becomes unreliable as you move deeper into the area. We recommend using GPS, an offline map, and a compass as a backup.
An offline map is particularly useful because it allows you to continue navigating when a live cellular connection is unavailable.
Before leaving reliable service:
- Download the map.
- Save the relevant trailhead.
- Mark the major attractions.
- Check the route direction.
- Carry a backup navigation method.
- Make sure your phone has enough battery for the entire day.
One documented hike used the Maps.me app with an offline Utah map, while another recommends GPS and a compass as backup tools.
Know the Major Sights Along the Canyon
A one-day trip can include several major landmarks, depending on how far you travel.
| Landmark | Why It Matters |
|---|---|
| Jacob Hamblin Arch | Major landmark near the Sneaker Route descent |
| Coyote Natural Bridge | Large natural formation along the water |
| Secret Lagoon | Hidden water feature |
| Cliff Arch | Scenic arch farther into the canyon |
| Cliff Arch Falls | Waterfall near the later portion of the route |
| Steven’s Arch | Major arch requiring additional mileage |
The difference reflects different ways of describing the trailhead, approach, and exact point being measured, so hikers should rely on their selected route map rather than treating every mileage figure as interchangeable.
Coyote Natural Bridge and the Water
After reaching Jacob Hamblin Arch, the route can continue toward Coyote Natural Bridge.
The trail often follows the water and may sometimes pass directly through it. Because of that, the experience is different from a desert trail. One hiker recommends having a way to filter or clean water and wearing waterproof hiking boots.
Expect conditions to change between dry sand, rock, and wet sections.
Useful preparation includes:
- Water-compatible footwear
- Extra socks
- Water filtration equipment
- A way to protect important electronics
- Enough drinking water for the day
Secret Lagoon and Further Attractions
The Secret Lagoon is another attraction mentioned by the hikers. It is described as a hidden feature that can be reached by following the route farther into the canyon.
Beyond this area, the route can become increasingly confusing because of social trails.
One hiker reached Cliff Arch and a waterfall before turning around. Steven’s Arch was described as requiring several additional miles, making it less practical when completing the hike in a single day.
The lesson is useful for itinerary planning: choose a turnaround point before the hike, rather than continuing until time becomes a problem.
Alternative Entry Routes
Not every Coyote Gulch entrance is designed for a short one-day trip.
| Entry | Key Detail |
|---|---|
| Hurricane Wash | About 6 miles before reaching the canyon in one route description |
| Red Well | About 7 miles before entering the canyon |
| Crack in the Wall | Can shorten the approach but involves difficult vehicle access |
| Water Tank / Sneaker Route | About 2 miles to the descent area in one documented itinerary |
The Hurricane Wash approach is described as a popular route but adds significant mileage before reaching the canyon. Red Well similarly involves approximately 7 miles before entering the canyon.
Crack in the Wall provides another way to shorten the hiking approach, but the road to it includes approximately 2 miles of sand, and a 4×4 vehicle is recommended.
Driving to the Trailhead
Getting to the trailhead is part of the adventure.
From Escalante, one documented itinerary follows BLM 200 toward the Jacob Hamblin Arch area. The drive is approximately 36 miles and was estimated at around 1.5–2 hours. The author reported averaging roughly 30 mph because of gravel and corrugated dirt roads.
Road conditions can change considerably.
Heavy rain can make the roads muddy or difficult to pass, while cattle grates and rough sections require careful driving.
For the more difficult trailhead approaches, the emphasize AWD, 4WD, or high-clearance vehicles.
One account specifically warns that Hole in the Rock Road becomes increasingly rocky and includes a section of approximately 100 feet of deep sand near a trailhead.
Pack for Sand, Water and Remote Terrain
Coyote Gulch is not a place where a minimal day-hike setup should be taken for granted.
Based on the combined experiences, your preparation should account for:
- Plenty of water
- Salty snacks
- Offline navigation
- GPS
- Backup compass
- Suitable hiking footwear
- Water-compatible footwear
- Extra socks
- Water filtration
- Sun protection
- Appropriate clothing
- Rope if your selected route requires it
- A charged phone and backup power
One specifically notes very different conditions between late February and late September, with the former described as cool and the latter as unpleasantly hot.
What Makes Coyote Gulch Difficult?
The mileage alone does not explain the difficulty.
The main challenges are:
- Remote access
- Poorly defined navigation
- Steep canyon entry and exit
- Sand
- Water sections
- Long return journey
- Rough access roads
- Changing weather
- Limited services
One experienced account rates the hike from moderate to very difficult, depending on the route and season.
The combination of navigation and terrain means that a physically fit hiker can still have a difficult day if the route is poorly planned.
A Practical One-Day Schedule
For a roughly 10–12 mile itinerary, an early schedule can help keep the day manageable.
| Approximate Time | Plan |
|---|---|
| 7:00 a.m. | Begin hiking |
| Morning | Approach the canyon and descend |
| Late morning | Explore Jacob Hamblin Arch |
| Midday | Continue toward Natural Bridge and other sights |
| Afternoon | Reach your planned turnaround point |
| Afternoon | Begin return journey |
| Before dark | Complete the final approach and return to vehicle |
This is a planning framework rather than a guaranteed timetable. The documented experiences range from approximately 8 hours for a 12-mile hike to 8.5 hours for a 10.7-mile group hike.
Should You Choose the Sneaker Route?
For a first one-day attempt, the Sneaker Route has a strong practical advantage: it provides a relatively direct approach to the canyon and allows an out-and-back itinerary.
However, the steep descent is the major consideration.
If you are comfortable with the terrain, have appropriate equipment, and understand the navigation requirements, it can provide access to Jacob Hamblin Arch, Coyote Natural Bridge, Secret Lagoon, and other canyon features without requiring a traditional multi-day backpacking trip.
If the descent is outside your ability or comfort level, a different entrance may be more appropriate.
Do You Need a Permit?
The accounts distinguish between day hiking and overnight trips.
The Nature Seeker states that a permit is not required for a day hike, while camping inside Coyote Gulch requires a permit. Be My Travel Muse similarly states that permits are available at the trailhead and are required for overnight hikes.
Because rules can change, hikers should verify current requirements before traveling.
Frequently Asked Questions
Can you hike Coyote Gulch in one day?
Yes. The
document several one-day approaches, including approximately 10-mile options and a documented 12-mile out-and-back hike.
How many miles is the Coyote Gulch day hike?
The distance depends on the route. The main day-hike options discussed are around 10 miles, while one documented Sneaker Route hike covered 12 miles.
What time should I start Coyote Gulch?
An early start around 7–8 a.m. is recommended in the
experiences. One documented hike started at 7 a.m. and finished before 3 p.m.
How steep is the Coyote Gulch descent?
The descent descriptions vary, but one account describes a roughly 250-foot rock face at approximately a 45-degree grade. Another describes a descent of about 200 feet.
Do you need a rope for Coyote Gulch?
For the steep Sneaker Route descent, the
recommend carrying a rope rather than relying on equipment left at the site. One hiker carried a 200-foot rope.
What is the easiest one-day route?
The Sneaker Route/Water Tank trailhead is described by The Nature Seeker as the easiest of the three main one-day options.
Is Coyote Gulch difficult to navigate?
Yes. The routes are not consistently marked, and some sections can be confusing. GPS, an offline map, and a compass provide useful navigation backups.
Do you need a 4WD vehicle?
The access roads can be rough, sandy, and muddy. The
recommend AWD/4WD or high-clearance vehicles for the more difficult approaches.
How far is the drive to the trailhead?
One documented route from Escalante involves approximately 36 miles of driving and takes around 1.5–2 hours, depending on road and driving conditions.
What is the best thing to see in Coyote Gulch?
Jacob Hamblin Arch is one of the key landmarks because it is close to the Sneaker Route descent. Other major attractions include Coyote Natural Bridge, Secret Lagoon, Cliff Arch, waterfalls, and Steven’s Arch.
Final Planning Takeaway
A successful one-day Coyote Gulch hike is primarily about route selection and preparation, not simply covering miles quickly.
For a first attempt, the Water Tank/Sneaker Route provides a relatively direct day-hike strategy, but its steep descent demands respect. An approximately 10–12 mile day can take around 8 hours or more, especially when sand, photography, navigation, and exploration are included.
Start around 7–8 a.m., download your navigation tools before losing service, carry sufficient water, prepare for wet and sandy terrain, and choose a clear turnaround point. Most importantly, treat the return journey as seriously as the hike into the canyon.
That combination of planning, navigation, equipment, and realistic timing is what turns Coyote Gulch from a confusing desert route into a manageable one-day adventure.
Hi, I’m Marcus! I love exploring the outdoors and discovering incredible places. Through ExploreNatureTrips blog, I share my travel experiences, useful tips, and recommendations for the best sights, trails, and destinations to visit.